Blog
Party
Ideas for Kids Craft Parties: Unleashing Fun and Creativity
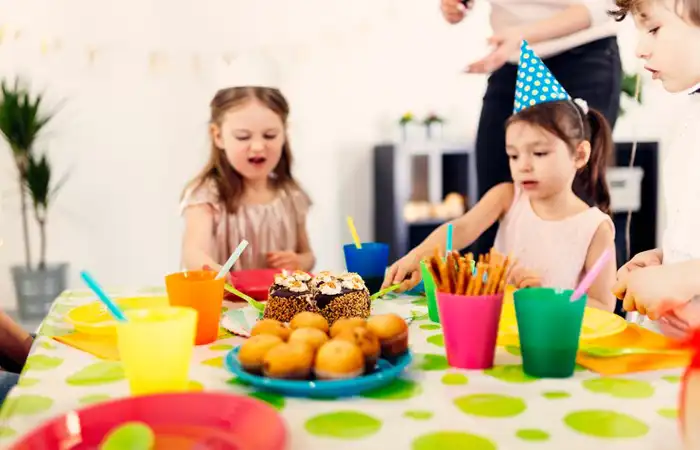
Organizing a kids party that is entertaining and interactive may be a lot of fun. A craft party is a great way to keep young attendees entertained. In addition to keeping youngsters occupied, craft parties foster creativity and offer them with one-of-a-kind, handcrafted mementos to bring home. These creative kids craft party ideas will help your gathering become a memorable occasion..
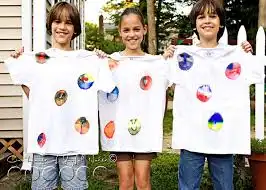
1. DIY T-Shirt Decorating.
- Plain white or light-colored t-shirts
- Fabric markers and paints
- Stencils and stamps
- Glitter, sequins, and fabric glue
- Iron-on patches and transfers
Arrange all the supplies and create a station for decorating t-shirts. Give every child a blank t-shirt and encourage them to use their imaginations freely. They can add some shine with sequins or glitter, and create designs with fabric markers and stencils. Kids may make their own wearable art with this project, and they will enjoy showcasing their own creations.
2. Paper Plate Masks.

- Paper plates
- Paints, markers, and crayons
- Craft sticks
- Feathers, glitter, and stickers
- Glue and tape
- Scissors (child-safe)
Give the children paper plates, and allow them to decorate the plate into a mask by selecting their favorite animal or fictional character. The plates can be painted or colored, and then embellished with stickers, glitter, and feathers. As a handle, affix a craft stick to the plates bottom. Once the masks are finished, this is a great way to encourage imaginative play.
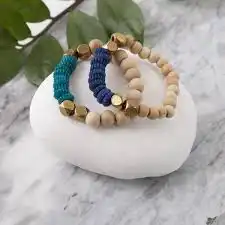
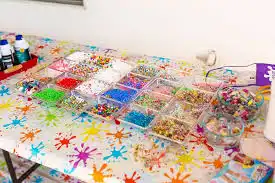
3.Beaded Necklaces and Bracelets.
- Assorted beads (plastic, wooden, or glass)
- Elastic string or thread
- Clasps and connectors (optional)
- Bead organizers
Give the children a range of vibrant beads so they may make their own necklaces and bracelets. Teach them how to make strong knots and string the beads. Using clasps and connectors, you can introduce more intricate designs to older kids. This is a popular exercise since it is easy to do and yields lovely, unique results.
4. Slime Making Station.
- White glue
- Baking soda
- Saline solution
- Food coloring
- Glitter and small mix-ins (optional)
- Bowls and mixing spoons
Provide a station where children can mix their own slime. Give precise directions on how to mix the materials together: Add a few drops of food coloring and continue to stir after combining one cup of glue and one tablespoon of baking soda. Add saline solution little by little until the slime has the right consistency. Youngsters can add glitter and other mix-ins to personalize their slime. To allow them to take their slime creations home, make sure you have airtight containers.
5. Painted Rock Art.

Assemble a variety of polished stones and prepare a painting area. Youngsters can paint patterns, animals, or bright designs on their rocks. To protect the artwork, use a sealer spray after the paint has dried. You can use painted rocks as yard decorations, paperweights, or mementos.
- Smooth, flat rocks
- Acrylic paints
- Paintbrushes
- Sealant spray (for preserving the art)
- Paint palettes and water cups
6. DIY Bird Feeders.

- Pinecones
- Peanut butter or vegetable shortening
- Birdseed
- String or yarn
Spread peanut butter or vegetable shortening over pinecones and roll them in birdseed to assist children in creating easy bird feeders. For hanging, tie a piece of thread or string around the top of the pinecone. Children may learn a lot about ecology and wildlife by making these simple bird feeders.
7. Personalized Picture Frames.
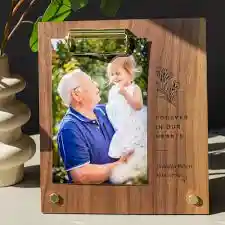
- Plain wooden picture frames
- Paints and paintbrushes
- Stickers, rhinestones, and other embellishments
- Glue
Give the children simple wooden picture frames to paint and decorate. To add flair to their frames, they might add stickers, rhinestones, and other accessories. Once the frames are decorated, print off pictures of each child from the party, either as a group or individually, and insert them into the frames. This offers a fantastic memento of the celebration.
Last Words on How to Throw a Great Craft Party.
Set Up Stations:Â To keep things organized and manageable, arrange various craft projects at distinct stations.
Supervision:Make sure there are adequate adults or older children there to oversee and help with the crafts.
Aprons and Covers:Give the children aprons or old shirts to shield their clothing from glue and paint.
Take-Home Bags:Make sure every kid has a bag to carry their projects and any extra materials they may have.
With these creative and engaging kids craft party ideas, you are sure to host a party that is both fun and memorable. Happy crafting!

About author

Jason Williams
Hello! I'm Jason Williams, the creative mind behind Ideas for Kids Craft Parties: Unleashing Fun and Creativity. I’m passionate about sharing ideas, tips, and inspiration across a variety of topics to help enrich your daily life.
4 Comments
Leave a Reply
Advertising

Instagram Feed


Scroll to Top
Noah
Thanks for the fantastic ideas!
James
Thanks for the great tips overall.
Charles
Keep up the great work!.
Marie Johnson
Thank you for the detailed tutorial and creative ideas!